Purchase Management
Adding Purchase
1. Go to – Purchases -> Add Purchases
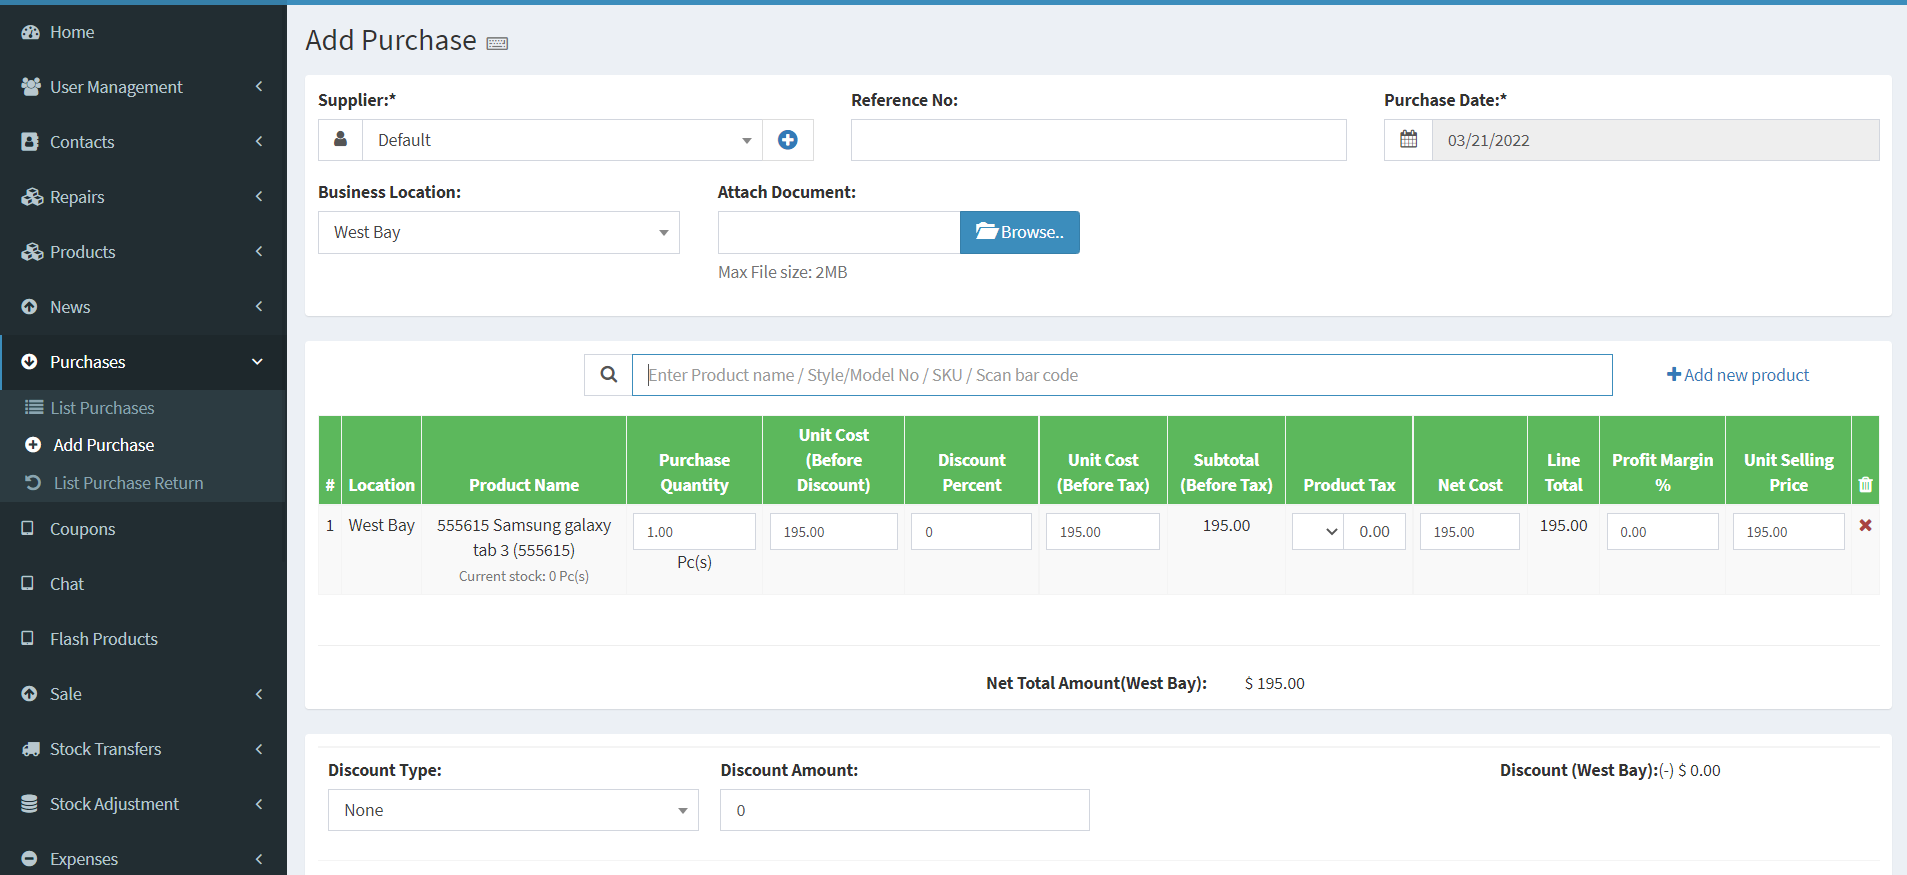
2. Type Supplier Name or Business name in Supplier field. If the supplier doesn’t exist you must add them from Contacts -> Suppliers -> Add
3. Enter Purchase reference number, Purchase date & Order Status.
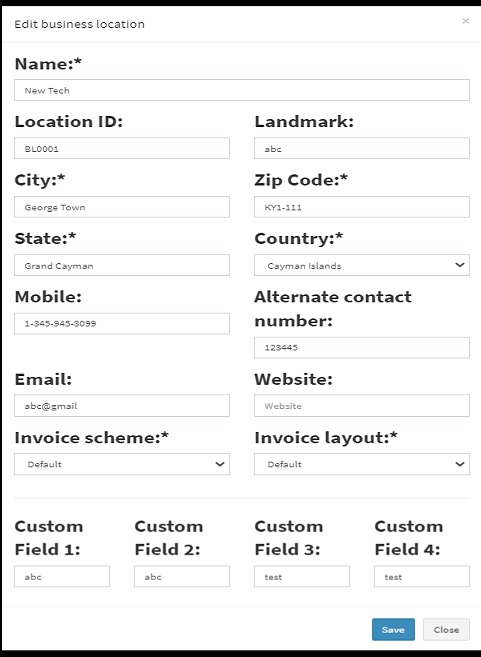
4. Select Business Location: Select a location where you want to add the purchase. You can add new Location from Settings -> Business Locations.
5. Type product name or scan the product barcode number. It will show related matched products, select a product to add it to the purchase list.
6. On adding a new product you can enter purchase quantity, purchase price, and tax information.
7. To add discount: Select the discount type (fixed or percentage) and enter the amount. WiseUp-POS will auto-calculate the amount after discount.
8. Enter purchase tax, Shipping Details, Additional Shipping charges, Payment status, & Additional notes.
You can view the list of purchases from Purchases -> List Purchases.
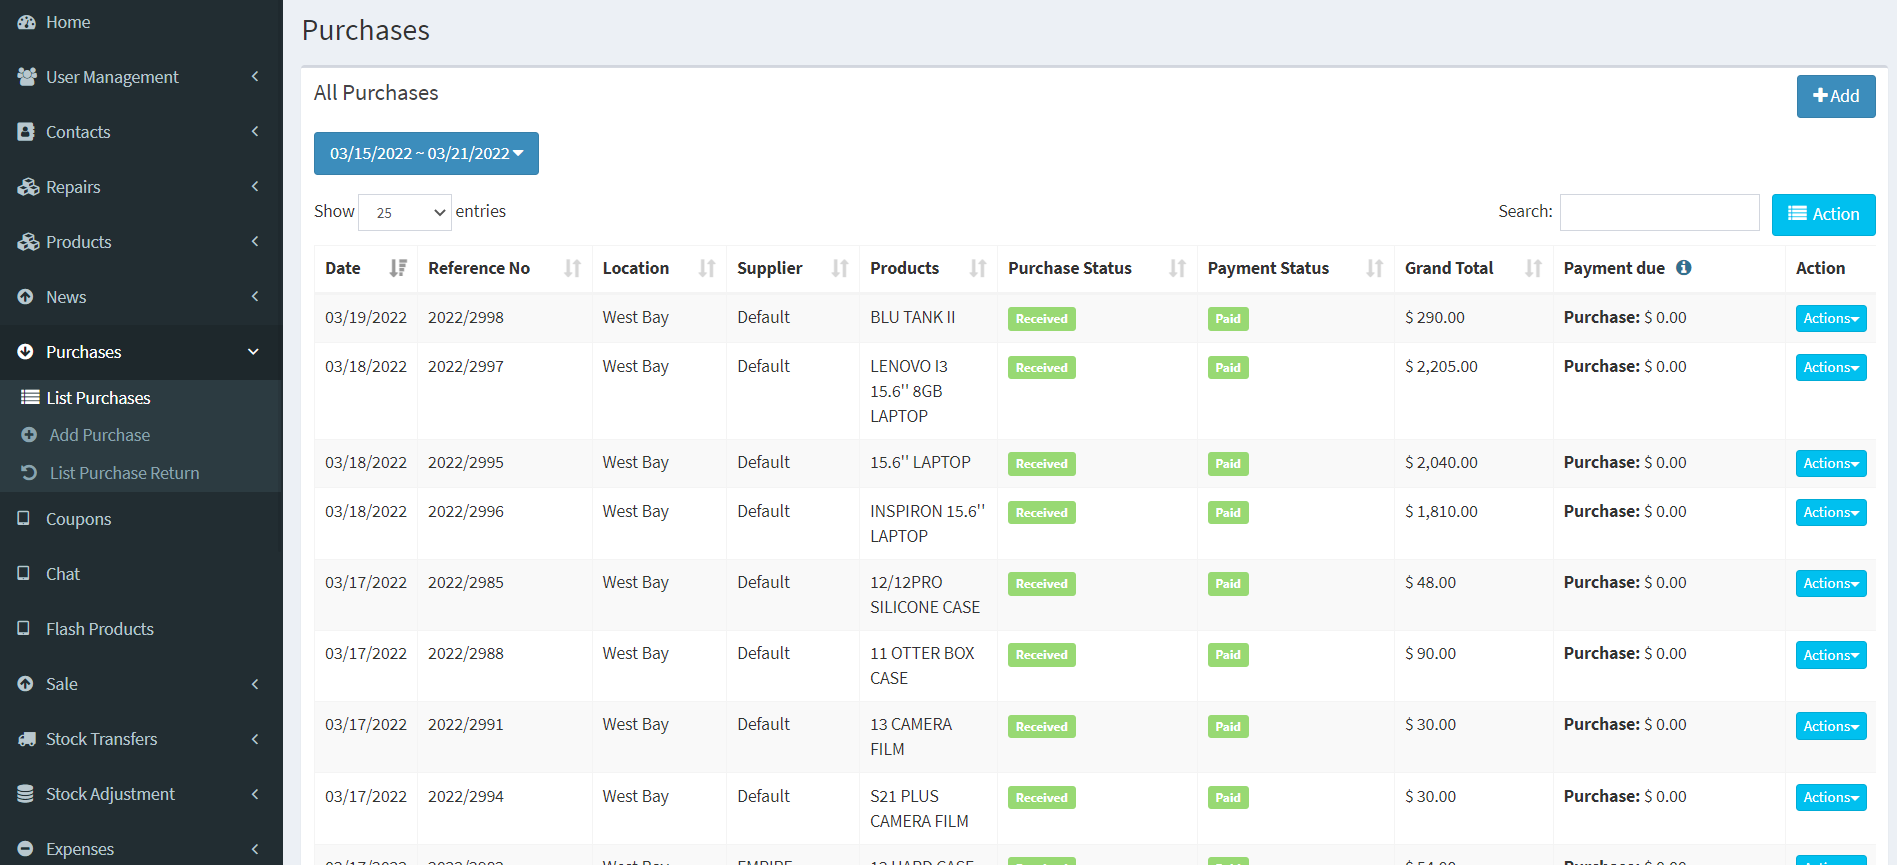
You can Print Labels for your purchase by Clicking “Print Labels” on List Purchases screen.


